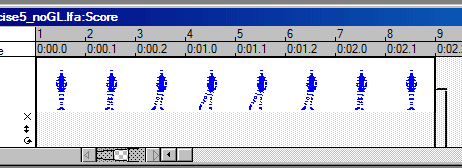
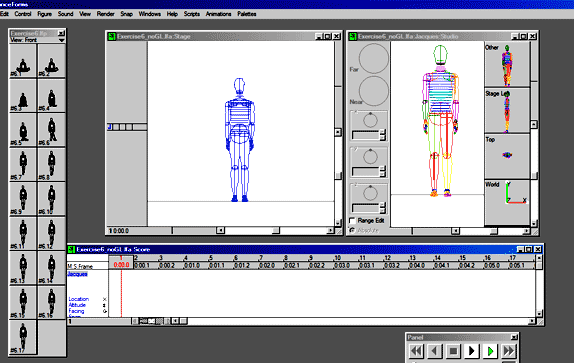
DanceForms Exercises are From: The Practical Guide (see the PDF)
Handout #03
Exercises 5 and 6
Exercise 5 - Tendu
Learn to:
1 Add new frames in the score (timeline) window (same as before)
2 Modify tweened positions for new keyshapes (in the keyframes)
3 Use the Auto-Snap command for the lowest body part (illusion of weight)
Two files to open:
Exercise5.lfa (the animation file)
Exercise5.lfp (the palette file)
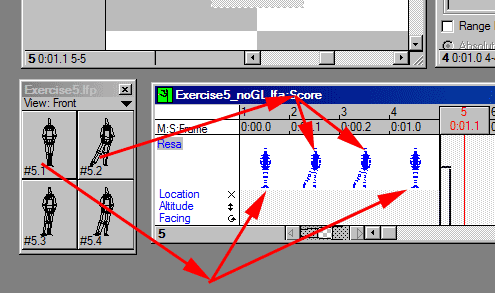
Click on frame #1 in the score window (timeline) to position your cursor
Then single-click (quickly and lightly) the palette choices:
5.1
5.2
5.2
5.1
Now, use the control panel to play the sequence to see what it looks like.
NOTE the little "hop" our dancer seems to take.
Her right foot moves out, angles down, then her whole body goes up.
Also, the movement is a bit abrupt. We need to smooth it.
OUR TASK right now - fix it.
Check each frame by clicking on the score.
The actual keyshapes are fine.
To smooth the transitions:
We need to add a frame between frames 1 and 2, and a frame between frames
3 and 4.
So, click between each pair of frames and hit the space bar once to add a
frame.
To change the "hop" we need to remember that DanceForms, by default, puts the lowest part of a dancer's body on the ground. As a result, the angled-down foot becomes the lowest part and the supporting foot winds up in the air.
Adjust her right foot
Click in the Score (timeline) in frame 2 (the empty frame which is being
tweened)
In the studio window:
Click on her right heel (she is facing you)
In the bottom right panel in the Studio window you will see "RFoot"
In the mid-top left panel note that this shows an angle of about 30-degrees
Change the foot angle so that the toe (which is now below the floor line)
is again just touching the floor
Repeat this for frame #5 so that you get both ends of the tendu.
NOTE: As soon as you change the angle of the foot a key figure icon appears
in the Score (timeline)
Now you can keep her on the floor but her supporting foot still moves. We
need to set auto snap.
Click and drag across frames 1 to 6 to select the active frames.
From the Snap menu choose "Auto Snap"
Look More Closely at what happens
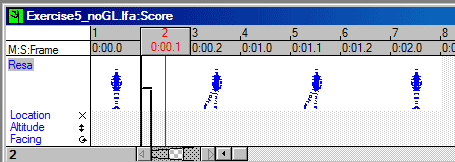
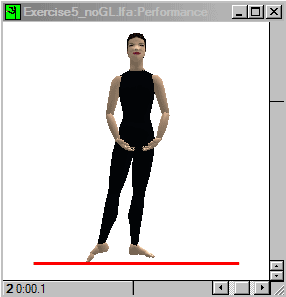
For this examination, I've placed one blank frame between each keyframe. Then I can look at each frame as it is drawn. Note that all the keyframes have the support foot properly on the ground. That is because each keyframe was specifically designed for that frame.
I've drawn a red horizontal line to represent the ground level just under the feet.
However, the two blank frames (#2 and #6) which are between keyframes standing in first and with leg fully out in the tendu don't look right. Here the toes are on the ground and the support foot is in the air, something not possible in real life where gravity has a lot to say.
The reason is that the process of tweening the frame caused a couple of things
to happen:
1 - the outside foot curves downward as an interpolated position, which leaves
the toes below the support foot.
2 - because the program regards the lowest part of the figure as at ground
level it now elevates the entire figure to place the toe on the ground, causing
the support foot to wind up in the air.
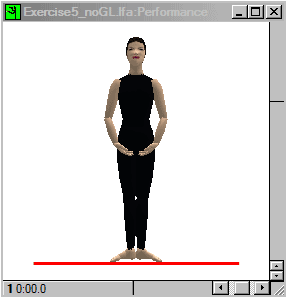 |
 |
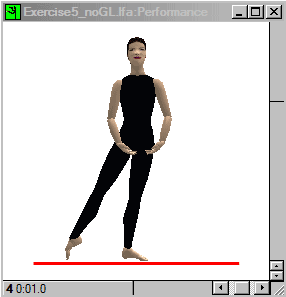 |
|
| #1 - keyframe: | #2 - tweened frame: a "hop" frame | #3 - keyframe: | |
| Note that I am not showing frame #4 because it is the same as frames #3 and #5. | |||
 |
 |
 |
|
| #5 - keyframe: | #6 - tweened frame: a "hop" frame | #7 - keyframe: | |
Basically there are two methods for dealing with this, directly adjusting the foot and setting auto snap.
Do Again, this time with more palette selections (smoother) and auto snap
- Start by Clicking in frame #10
- Click these selections in this order from the palette
- TO OPEN
- 5.1
- 5.3
- 5.4
- 5.2
- TO CLOSE
- 5.2
- 5.4
- 5.3
- 5.1
- TO OPEN
- Drag across the eight-frames and select AutoSnap from the Snap menu
- Click on frame 10 and Play the sequence
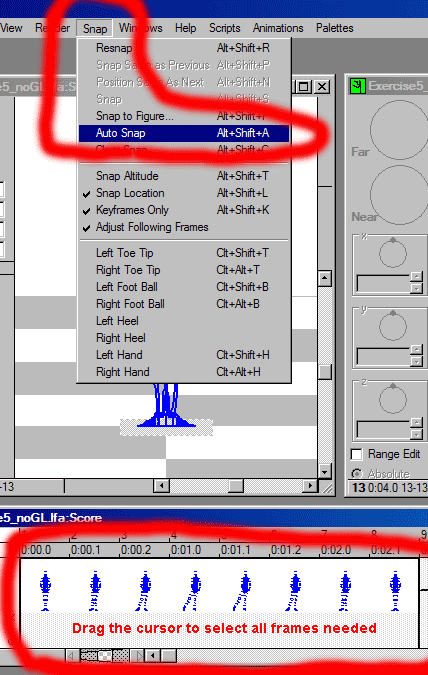
It should play looking like this
Save
Save your brush with a slightly different name.
Exercise 6 - Creating a Walk: location, paths, snap
Learn to:
Change the dancer's location in the Stage Window by
1 - using the Auto Snap Command
2 - dragging him to a new location using frame ghosts
3 - typing numerals in the location controls
Open Two Files:
Exercise6.lfa
Exercise6.lfp
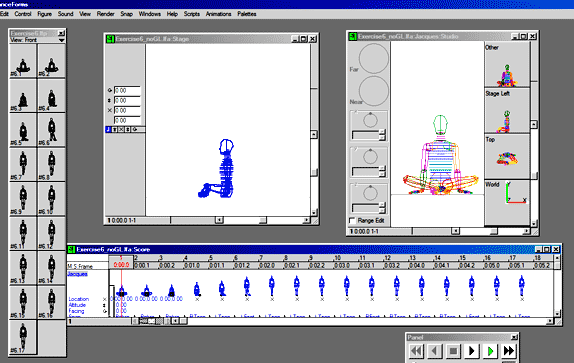
- Click in Frame #1 of the score
- Click on the palette positions: 6.1 through 6.17 (in order, of course)
- Close the palette
- Play the combination (using the play controls)
Note that Jaques does walking motions but doesn't go anywhere.
To make his walk take him somewhere we have to give him "traction."
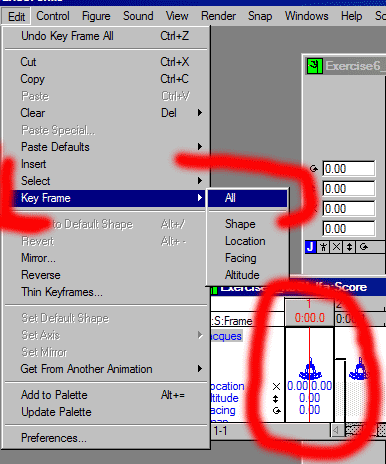
- Drag across just frame 1
- Select Edit menu > Key Frame > All
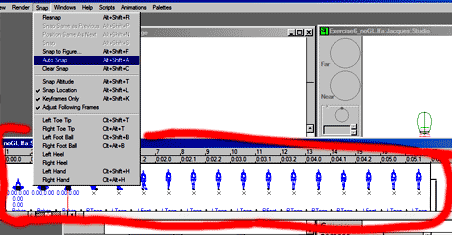
- Now drag across frames 2 through 17
- Select Snap menu > Auto Snap
- Watch the combination again, set the stage window to one of the side views
Save this, so far, under another name.
Examine this in the stage window from several viewpoints: sides, top, etc.
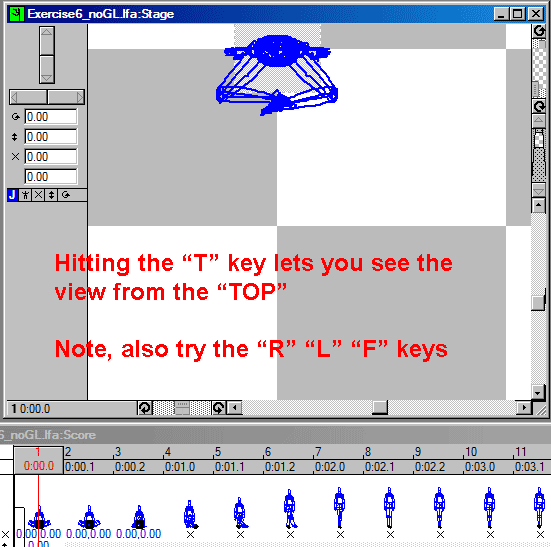
From the top view note the path he takes, a short step to his right and then
forward.
To see the line of travel displayed
1 Click on Jacques to select him
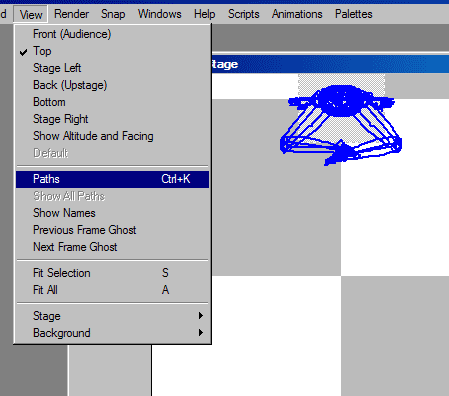
2 Click on the View Menu and choose: Paths
3 You will now see a line with nodes marking his path
onstage.
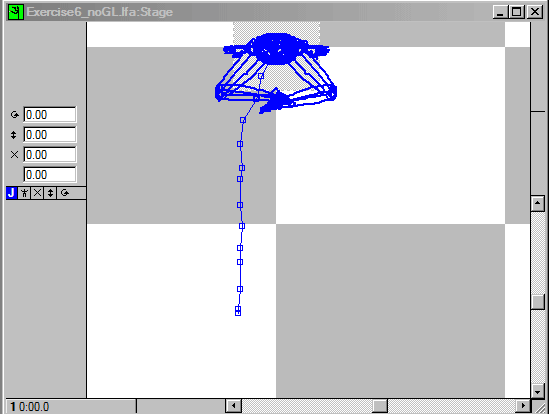
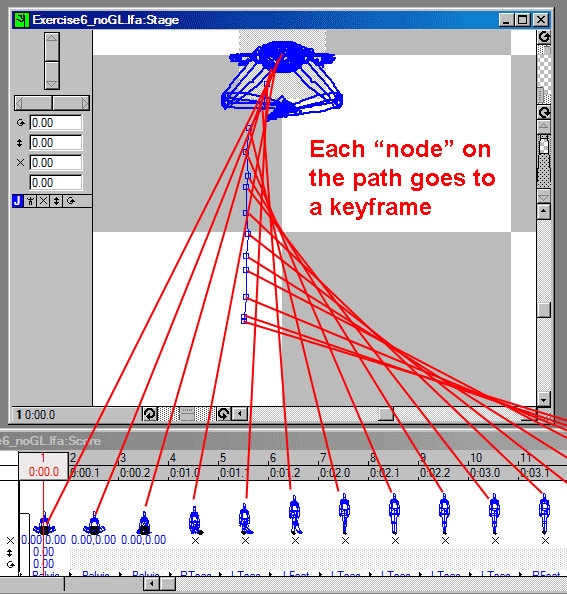
You can move your dancer on stage by clicking a node (corresponds to a keyfigure
[keyframe]) to select a dancer, then simply moving the dancer with your mouse.
To change the direction your dancer is facing (to match the path) click on
the dance figure in the stage window and then click on the left or right arrow
buttons (horizontal direction) to change the dancer's facing angle. It will
keep the angle until the next node change you make.
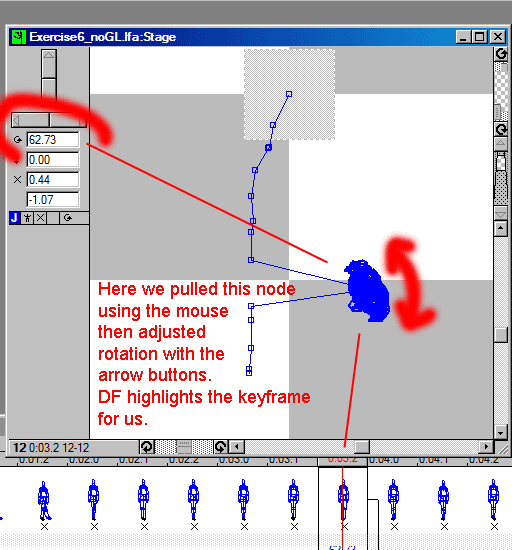
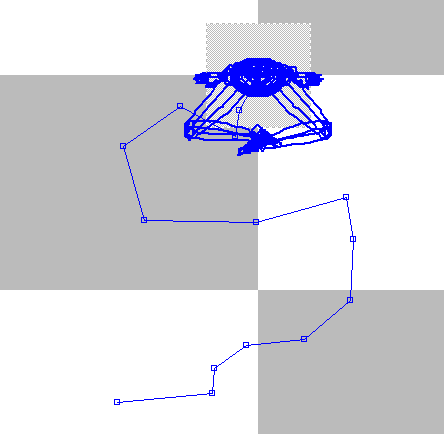
Here we arbitrarily selected nodes by clicking on a them. When you click on one of the nodes in a path the figure is superimposed over the node. You can no grab the figure and drag it where you want. You can also adjust the angle of the figure in the rotation box so that your figure is facing down the path. As in the double set of screen captures below.
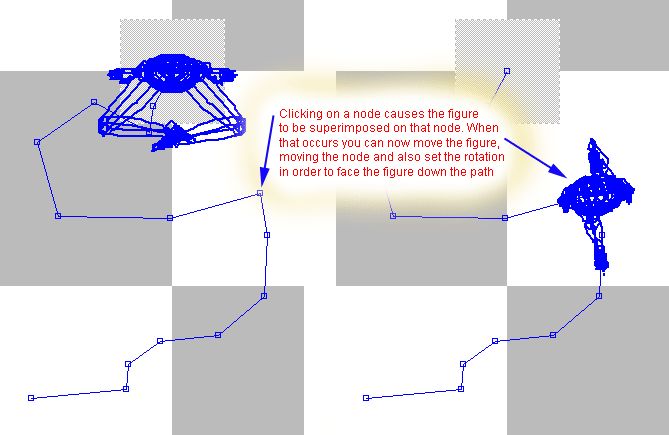
Above are two side-by-side screen captures showing first the path and then
the same path after clicking on one of the nodes causing DanceForms to place
the figure directly on that node which then allows us to manipulate the figure
in place on the node.
NOTE: You can also just click on the score (the timeline) and the figure will move to the correct spot on the path.
Click the Play control to see our Jacque get up and move along the path, turning
at each node (keyframe) where the rotation was set.
